1. Introduction
Welcome to the Quick Start Guide for Rons Data Stream.
This guide is designed to help you quickly get started with our application. While there’s a short learning curve, anyone who regularly works with data files will soon appreciate the significant time savings. Once everything is set up, you can process thousands of files in just a few clicks.
To automate file processing, two key components must be configured: the Job and the Cleaner. Think of it this way: the Cleaner defines what happens (the actions applied to your data), and the Job specifies to what (the files, formats, and destinations).
In the following sections, we’ll walk you through the basic workflow so you can start using Rons Data Stream with ease.
2. The Job
2.1 Purpose of a Job
A Job is where you configure:
- Source File(s): Where your data comes from
- Format(s): How your data is interpreted and processed
- Output Destination(s): Where your processed files will be saved
Additionally, Jobs let you convert files between formats (via Output Formatter settings), split files (using Output Shaper settings), and generate log files. Once configured, Jobs can be saved and reused later through File Explorer.
Getting Started:
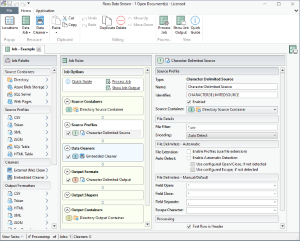
Click on New Job on the Start Page to open a new Job tab. The interface is divided into two primary areas:
- Job Palette: For selecting available options
- Job Rules: Displays detailed settings for the selected options
A button in the top-right corner opens the Preview Side Panel (see Section 4) to view outcomes as you adjust settings.
2.2 The Job Rules
Each Job requires these seven key settings:
- 1. Source Containers
- 2. Source Profiles
- 3. Data Cleaner
- 4. Output Formats
- 5. Output Shapers
- 6. Output Containers
- 7. Output Loggers
Note: A Job won’t run until all required settings are in place. If anything is missing, a yellow warning (“This Rule cannot execute with the current settings”) will appear.
2.2.1 Source Containers
The Source Containers section defines where your data is stored—either as files or as data tables. Available options in the Palette include:
- Directory
- Azure Blob Storage
- SQL Server
- Web Pages
By default, the "1 – Directory Source Container" is selected. When you click it, the settings appear in the middle of the screen, letting you browse for the folder containing your files. Once you select a folder and refresh, the files will appear in the Job Output area.
Tip: You can select multiple sources or outputs to process various files at the same time.
2.2.2 Source Profiles
Source Profiles determine how the data within a Source Container is filtered or parsed. You can use multiple profiles for a single Container. After selecting your Source Container, choose the file format from the Source Profiles palette. Options include:
- CSV (or any character Delimited format)
- Token
- XML
- JSON
- SQL Table
- HTML Table
As an example, select CSV to add it to the Job Rules area. Then, click on the newly added Character Delimited Source to open its details in the middle of the screen and choose the appropriate Source Container. Since only one Source Container was added during the initial setup, it will be the only option available in the dropdown menu. If multiple Source Containers had been added in Step 1, they would all appear in the dropdown for selection.
2.2.3 Data Cleaners
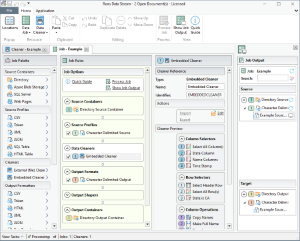
Editing actions are defined by Cleaners, which are directly linked to Job settings. A Cleaner can be used across multiple Jobs, saved in File Explorer, and reused whenever needed.
One or more Cleaner(s) can be added in the Job section. The Cleaner configuration has its own section in this guide (See 3. Data Cleaner).
There are two types:
- External (File) Cleaners:
Choose an existing Cleaner by browsing to its file location. Once added, you can click Edit in the middle section to open it in a new tab for modifications.
- Embedded Cleaners:
Create a new Cleaner by selecting this option and clicking Edit. This opens the Cleaner in a new tab where you can configure and save it.
Important tip: To preview the changes made by your Cleaners, return to the Job tab and open the Preview Side Panel. Refresh it regularly to check that the data looks as expected.
2.2.4. Output Formats
In the Output Formats section, establish the format in which your files will be saved after processing.
Note: Rons Data Stream can work as a powerful converter—even without using a Cleaner.
Choose from these formats in the Palette:
- CSV
- Token
- HTML
- XML
- JSON
- Text Template
- SQL Table
- SQLite Database
Several Output formats may be selected. For each selected format, the relating middle section setting area requires to choose an Output Container. That way the different formats can be saved into their own folders.
At this point, if the Output Containers weren't selected yet from the Palette, then they wouldn't show in the drop down menu in the Output Format setting area. Select them first from their Palette, then go back and then they will be listed in the drop down menu and it will be possible to select them. The Job wouldn't be able to be processed without them.
Important: In all settings, whenever a new name (or an identifier) needs to be created, the required field is auto-generated by default as it's a compulsory field. However, it can be customized if desired.
2.2.5 Output Shapers
The Output Shapers section lets you split files as they’re processed. Choose from four different shaper types in the Palette:
- Split - Row Count
- Split - Row Ratio
- Split - Row Filter
- Split - Column Value
2.2.6 Output Containers
Output Containers determine where your processed files are saved. The Palette offers these options:
- Directory
- Azure Blob Storage
- SQL Server
2.2.7 Output Loggers
For each Job, a log file is automatically generated once files are processed. In the Output Loggers section, choose where to save these log files by linking them to the appropriate Output Container. If you have multiple containers, you can assign different log files to different destinations based on your preference. Setting up log files is optional.
3. The Cleaners
3.1 Purpose of a Cleaner
Now that the Job (the “where and how”) is set up, it’s time to define the “what”: the Cleaner. A Cleaner specifies the editing operations that will be applied to your data files when a Job runs. You can create one or more Cleaners and add them to a Job in any order; if multiple Cleaners are used, they execute in the order they appear.
3.2 Cleaner Rules
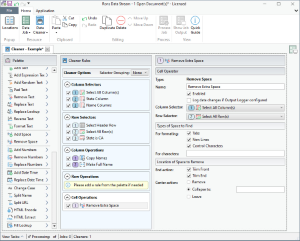
To create a Cleaner, click on New Cleaner on the Start Page. This opens a new Cleaner tab featuring a Cleaner Palette and the Cleaner Rules area.
Within the Cleaner Rules area, you’ll find:
-
Selectors:
- Column Selector
- Row Selector
-
Processors
- Column Selectors
- Row Selectors
- Column Operations
- Row Operations
- Cell Operations
These components let you specify exactly where the editing should occur and what actions to apply. To add a new operation, click on the appropriate Selector or Processor in the Palette (look for the blue arrow). This will add the rule to the Cleaner Rules area with a colored number that identifies its order. You can then click on the rule to open its setup panel on the right and configure its settings.
Note: Rules can be moved, duplicated, or deleted using options in the Home Menu. If a rule isn’t complete, it will display a message (with a hand icon) saying: “This rule cannot execute with the current settings.” This means you’ll need to adjust its configuration.
3.2.1 Columns Selectors
Choose the columns where the editing will apply. The Palette offers three options:
- All Columns (Selected by default)
- Column Range
- Column List
This section is compulsory; You must have at least one rule here.
3.2.2 Rows Selectors
Set the rows that will be affected by the editing action. The options available are:
- Header Row (Selected by default)
- All Rows (Selected by default)
- Row Range
- Empty/Filled Rows
- Filter
Note: Although Header Row and All Rows are selected by default (meaning the rules apply across the entire data sheet), you can easily delete or deactivate them if necessary. This section is also compulsory and requires at least one rule.
3.2.3 Column Operations
Here you can set up editing actions specific to columns. The available Column Processors include:
- Add Columns(s)
- Update Column
- Copy Column
- Move Column
- Delete Column
- Merge Column
- Split Column
3.2.4 Row Operations
For editing actions that affect rows, choose from these three options:
- Add Row
- Delete Row
- Split Row
3.2.5 Cell Operations
This section provides a variety of actions for editing individual cells. The available Cell Operations include:
- Add text
- Add Expression Text
- Add Random Text
- Pad Text
- Remove Text
- Replace Text
- Replace Lookup
- Reverse Text
- Format Text
- Add Space
- Remove Space
- Add Numbers
- Remove Numbers
- replace Numbers
- Add Date Time
- Replace Date Time
- Change Case
- Split Name
- Split URL
- HTML Encode
- HTML Extract
- Fill Lookup
4. Finalizing the Job
The final steps take place in the Job section.
Once all Job rules are configured and at least one Cleaner is integrated, the Job can be executed by clicking the Process Job button which is available in the top menu or within the Job Options area of the Job Rules section.
However, before running the Job, it’s recommended to review and ensure that the actions applied to the files are correctly set up and will produce the expected results. To do this, use the Job Preview feature.
Note: The Preview and Process Job buttons are only active within a Job. In a Cleaner, the buttons are grayed out.
4.1 Job Preview
Clicking the Preview button in the top-right corner opens a section displaying all the files queued for editing. Each file has a dedicated Preview button.
Selecting a file preview opens a window showcasing:
- The original data (Data Source view).
- The processed result (expected outcome after running the Job).
- Cell Change details (clicking on the Cell Change button highlights affected areas, showing the Column, Row, or Cell operations applied—each linked to its corresponding rule number).
If adjustments are needed, you can open the corresponding Cleaner in a separate tab, modify the settings, and immediately return to the Preview window to verify the updated results.
Tip: After making changes, always click Refresh in the Preview panel to ensure the latest up updates are displayed.
4.2 Processing the Job
Once everything is set up correctly, processing the Job is straightforward:
-
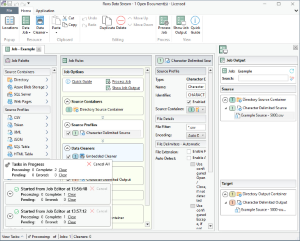
Click the Process Job button.
-
A progress panel will appear, briefly displaying task statuses:
- Processing
- Complete
- Pending
- Errors (if any occur)
-
The progress panel closes automatically after a moment but can be reopened anytime by clicking View Tasks in the bottom-right corner of the screen.
This area confirms whether the Job ran successfully, partially, or failed, helping you troubleshoot if necessary.
5. Conclusion
Rons Data Stream is a powerful tool that takes a little time to set up, but the effort pays off significantly. Once your Jobs and Cleaners are configured and linked, the application can process large volumes of files or entire folders effortlessly, making it an invaluable time-saver for managing and transforming data.
We hope this guide has helped you navigate the setup process. Happy data processing and don’t forget to send us your feedback!
Related Information
CSV Editing
Rons Data Stream
Application
Examples


